My Garden 2.0: Time is Right for Spring Cleaning and Planting
- By Rebecca North
- Reading Time: 8 mins.
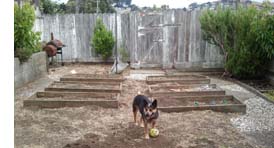 It finally rained in the Bay Area and I’m ready to attack the garden with full force. This little plot of the backyard was a dustbowl when I moved into the house last June. Over a month of weekends and eventful evenings, I added lots of new soil, pulled out a couple of trees and loads of weeds. I rounded up friends and family to help trim back the largest rosemary bush I’ve ever seen, haul sod, chop wood for planters, and help identify mushrooms, trees, and birds.
Though I spend lots of time with farmers buying what they grow for The FruitGuys, actually growing something myself was a whole other can of worms. I gardened a bit with my dad when I was a wee lass, and have great memories of pulling asparagus straight out of the ground and eating them, sitting on the little red fence while he tilled, harvested, and planted. My contribution typically resulted in pulling out new sprouting bulbs I had mistaken for weeds, playing with earthworms with my sister instead of hoeing (I didn’t want to injure them!), chasing rabbits with my brother, and eating half of the harvest before it reached the kitchen.
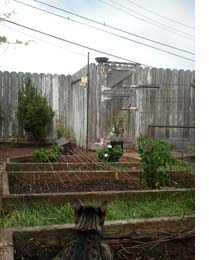 Having never gardened myself before, planting one was uncharted territory for me. Mid-June I put in everything from broccoli to chamomile to tomatoes. Despite my enthusiasm, some plants grow better in San Francisco’s mild climate than others; I was amazed when summer crops such as tomatoes and the beginnings of a melon vine expanded, but wondered where in the world the chamomile was (it didn’t show up until January!), and what happened to the peppers (they died). In early July, I put in cilantro (which I don’t even really like), celery (that burnt to a crisp), and lemongrass (which did wonderfully but overwhelmed my delightfully spicy oregano). Anything I thought could grow, I put in the ground: seeds; starters; old potatoes from the cupboard; even leftover avocado pits.
I prepared to plant a cover crop in the winter by purchasing five pounds of cover crop seed in July and bought a 1.5 oz bag of seed inoculants to fertilize some nitrogen-fixing legumes that I was going to sow. For a natural insecticide, I chose neem oil, trading some homemade bath salts with a friend in exchange for a half-gallon. In August and September, I let many of my greens go to flower to attract beneficial visitors such as bees and hummingbirds (pollinators), and ladybugs to help manage the burgeoning aphid population. I started up a worm compost bin so I would have my own rich fertilizer and reveled in my vision of what My First Garden would be: healthy, beautiful, and useable.
Want farm-fresh fruit?
We've got you covered.
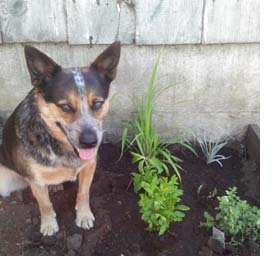
Reality set in within a few months. Suffice it to say that I forgot to plant my cover crop, the neem oil is MIA, I routinely forget to feed my worms, and the avocadoes never even sprouted. But oh! The sunflowers bloomed in October, just in time for my mom’s visit! And the petunias were in full bloom for my sister to see! November brought an abundance of kale and other unidentifiable greens, appetizing in their anonymity. Around December I saw a couple of clovers poking through the dirt, and by January, they had taken over everything from planter boxes to raised beds. I wasn’t sure the daisies would make it but they have thrived and proved resilient to the tennis ball bonanza of my three-year-old Cattle dog, Pekoe, even through February’s drizzles. The mysterious mustard greens, which I don’t even recall planting, have thrived and I have been juicing and smoothie-ing them for months. At this point, I’m hoping they’ll just wilt and I can turn ’em under to allocate their rich nutritional content to the living soil, instead of my tender taste buds.
 March means it’s time to get busy again. Even though I was a bit neglectful through winter’s shorter spans of daylight, the garden is full of life, miraculously crawling with rapacious earthworms, busy ladybugs, and insatiable salamanders (I thought they were baby snakes!). It’s time to weed and turn the soil, while the ground is still soft from the spring rains. I arrange my artillery: fresh organic soil, compost, and, of course, earthworm casings. As the botanist at Flowercraft, my neighborhood nursery, said, “It’s good crap.” Who can argue with that? I’ve been irrigating (i.e. sprinkling with a watering can) to make up for the minimal precipitation this winter and to keep the ground soft to facilitate weed pulling. I’ve got my new gloves and plenty of ambition. Now, I just need a plan for Garden 2.0.
Garden 2.0
I start by sketching a map of the garden with the raised beds and various planters (concoctions including but not limited to buckets, ruined stovetop pots, and rusty grills). I’ve been keeping track anecdotally of what planters and pots get sun at what time of year. Now I take note of which areas get morning sun, which get afternoon sun, and which get the strong midday sun.
I’ve been collecting seed packets since last July from farm conferences, friends, and nurseries. I read the back of seed packets for specific plant needs: how far apart to plant, how deep, sun needs, climate and water requirements, harvesting suggestions, and storage instructions. You can also lookup what kind of planting zone you live in and see when is the right time to plant which seeds. I’ve decided that this year I don’t need to plant every single seed at once. I consult Pam Pierce’s invaluable Golden Gate Gardening: The Complete Guide to Year-Round Food Gardening in the San Francisco Bay Area and Coastal California”, Wendy Johnson’s “Gardening at the Dragon’s Gate: At Work in the Wild and Cultivated World”, and “Homegrown Herbs: A Complete Guide to Growing, Using, and Enjoying More than 100 Herbs” by Tammi Hartung, for plant positioning, organic pest management techniques, starting seeds, and transplanting.
Want farm-fresh fruit?
We've got you covered.
I make several lists, organized by month, to spread the planting love out a bit. Since this will be my first spring in this garden, I am trying to reel in my excitement a little, so I’ve narrowed the list down to 30 different veggies. I’ve got some that can be harvested little by little and are great for nibbling (kale, peas, and lemon verbena), and others that are great for successive plantings every 10-14 days for a continuous harvest (lettuce, spinach, and basil). I’m going to plant the Three Sisters (beans, corns, and squash) in the corner with the most sun, least wind, and space. No mustards—I’ve had enough of those.
To sprout the basil, tomato, and Echinacea seeds that I will be planting first, I simply put a couple of small holes in the bottom of an empty egg carton, add some organic seed-starting soil, and place the seeds just beneath the soil. I use a spray bottle to gently water, keep the cartons inside near the sunny window, and hope for the best. I keep an eye on the seeds, keeping the soil moist, and keeping my inquisitive cat, Bernie, off of them (he likes to help in the garden, especially with digging and fertilizing). If all goes well, they should be ready to transplant in 4-10 weeks, and by then hopefully, my Garden 2.0 map will be finished. I’m planning on a range of medicinal herbs such as Calendula (great for skin conditions and attracting beneficial insects), Tulsi (excellent for the nervous system and an ancient all-around healing herb), and Yarrow (fantastic for treating fevers). Also some edible flowers like violas, Johnny Jump Ups, and borage (the flowers taste like cucumbers!).
When you are growing an edible garden it can be difficult to wait for them to sprout, never mind waiting for the harvest. It’s hard to know when something is ”ready.” I’ve eaten many a sour tomato, several pea shoots before the pea even pops out (they’re sweet!), and pulled up what I thought would be big bulbous beets just to find several teeny tiny beets. I suppose I’ll cultivate that patience and pulse over time. This year I’ll be sure to keep track of what flourishes and what struggles, what smells good (lavender!) and what creates a stinky mess (unused chives). I’ll remain patient and passionate for this gratifying practice that provides peace of mind, gallivanting with nature, and dinner!
Want farm-fresh fruit?
We've got you covered.The top five things I’ve learned in my novice gardening adventures:
1. Assess your microclimate and choose your seeds wisely
Talk to your neighbors, research your weather patterns and fog trends, and of course, have minimal amounts of expectation and a backup plan for your meals. Choose organic seeds; non-GMO; open-pollinated and/or heirloom seeds are also great. Some excellent resources to purchase seeds include Southern Seed Exposure, High Mowing, Hudson Valley Seed Library, Peaceful Valley, Terrior Seeds, Seed Dreams, Baker Creek Heirloom Seed Company, and Horizon Herbs.
2. Trial and Error
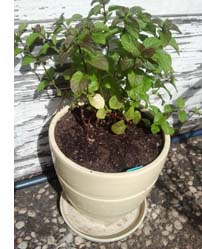
It’s been interesting to see what thrived and what died; the mugwort from Coco at Coco Ranch is gigantic, yet some sneaky nocturnal creatures enjoyed a buffet of Romanesco broccoli; Eggplants don’t like the fog; kale prefers more water than potatoes. Know what plants are invasive (mints!) and don’t plant them in beds or you will have an overabundance and/or a complete takeover of your growing space.
3. Planting Strategies
I got so excited, I just started planted everything. The organized rows I had in mind turned into a jungle: bolting greens smothered the short, the stout, and the slow growers; spearmint sprawled over everything. Read the back of the seed packet about allotted space and depth of planting. (Also interesting to explore, though teetering on the intermediate gardening territory, are methods such as rotating crops and companion planting. Rotating strawberries and broccoli helps control pests and fungus, as well as puts into the soil what the other crop depletes. Broccoli loves calcium, so pairing it with plants that need little calcium, such as beets and nasturtiums, works out great. However, avoid planting broccoli, and other brassicas (broccoli, cauliflower, Brussels sprouts), with nightshades (potatoes, tomatoes, eggplant) and mustards; brassicas need lime to thrive and tomatoes especially leach lime out of the soil.)
4. Ask questions
Friends, family, neighbors, and your friendly neighborhood independent nursery owner can provide a wealth of information about when to plant something, how to harvest it, and what to do with it once you’ve picked it. Libraries and the Internet are also excellent resources.
5. Plant what you like to eat
Though it is fun to watch everything grow, it does get expensive, time-consuming, and even bothersome to deal with unruly crops that you don’t care to eat. For example, I prefer parsley over cilantro and they have similar sun, shade, and temperature requirements, so I will plant parsley this year and let my cilantro go to seed for the butterflies. Experiment with open-pollinated heirloom varieties available from heirloom seed suppliers. Though their yield is often less than commercial varieties, their flavor is phenomenal and you will be the only one you know with a four-pound tomato. Your garden should be a reflection of what you like to taste, feel, and smell—you will be spending lots of time with it before you actually reap and eat its benefits.
Want farm-fresh fruit?
We've got you covered.
_____________________
Rebecca North is a West Coast Buyer for The FruitGuys. She lives in San Francisco.


